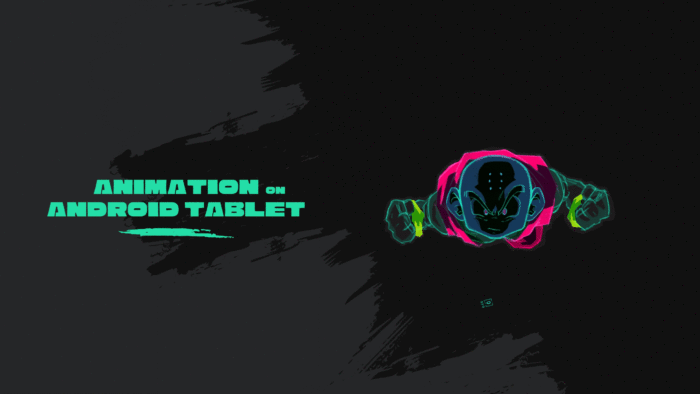
AnimLog 01 – Krillin flying

Dragon Ball Z Namek arc: Krillin flying
To create this animation loop I followed a structured process aimed at replicating the iconic style of the Dragon Ball Z Namek arc.
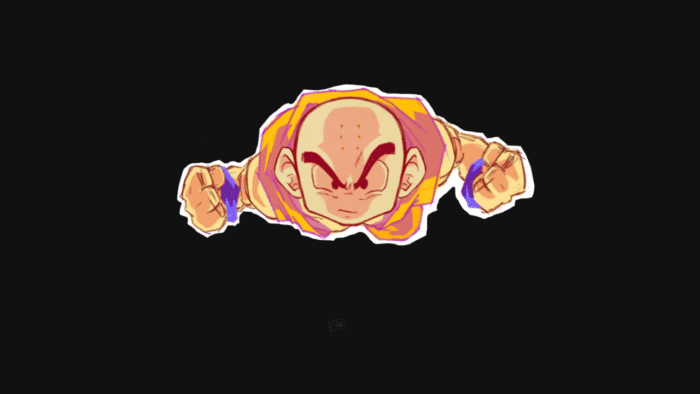
Krillin in a frontal flight pose
As you can see, Krillin in a frontal flight pose. Watching the Namek Arc, I noticed that it’s a recurring action. So I chose this specific pose because of its repetitive nature. It makes it ideal for a loop or GIF format.
Animation analysis
A bit of observation led me to a more organized animation analysis:
Minimalist approach: 3 frames are sufficient
Based on an analysis of the DBZ Namek Saga, in order to recreate an effective animation loop that is faithful to the original series, I noticed that only 3 frames are sufficient to convey the desired movement.
The Japanese animators used a minimalist approach, so I took the same route and used three sketches where one sketch equals one frame, in order to build up my loop.
Being Selective! Focus on Animation:
A key principle of this 2D animation is that the head and body remain fixed while only the clothing and wristbands move. This observation allows you to put your energy on what’s matter. Being selective helps you keep the focus on the animation of specific elements that quickly move without needing to redraw the entire character at each frame while simulating high-speed movement.
How to simulate High Speed:
Here, you also want to convey the feeling of wind resistance and speed during this animation loop, and you wonder how to simulate high speed in 3 sketches, while ensuring the movement is visually continuous and clear? Simple: you can achieve this by drawing three variants of the clothing in different, sometimes “brusque,” positions.
When these variants are cycled, they will deliver a fast paced flight sensation.
Strategic Layer Hierarchy:
On your Android tablet, inside the Sketchbook app, you can organize your artwork into several layers. Use a strategic layer hierarchy to organize your animation into three distinct layers to manage the visual elements. The head and the body are fixed during the loop so it’s wise to place them in separate layers and treat them according to their need of movement.
This organization is vital for the animation phase.
So let’s break it down:
Top Layer: The head
During the animation, it remains the predominant and fixed feature in the frontal flight pose.
Middle Layer: Contains the elements that will be animated
The clothing and wristbands.
Since these are the only parts that “flutter” to simulate high-speed movement, you will eventually create different variants of this layer while keeping the others static.
Also, the Sketchbook app gives you the possibility to group layers into group “folders”. This is very helpful when it comes to organizing the animated elements of this project.
Bottom Layer: The Body
This layer is placed at the very bottom of the hierarchy and contains the rest of the body, consisting primarily of shoulders and arms.
Head on top, body on the bottom, and clothing in the middle guarantees that the animated elements appear in the correct visual position.
All you have to do now is to sketch it out and make Krilling fly like his life depends on it. ..and on Namek it sure did!
That’s it!
The sketch animation part is done and stay tuned for the next animation journaling Krilling flying on Namek!
Tell me how hard that exercise was?